Swift Initializers Part 1: Structs
Swift Initializers: Understanding Initializers in Structs
Introduction
Over the years, I have created a number of videos address the topic of initializers in Swift. If you are interested in those videos instead of reading this blog, you can find them here.
Everyone has their own learning style, so I thought that for those of you who prefer written content over YouTube videos, I would create an blog post and see if that works for you.
This is the first of two posts on initializers and in this one, I will focus on initializers in structs.
One of the first things you'll encounter when learning Swift is the concept of an initializer. Every instance of a struct must be initialized before it can be used. An initializer ensures that all stored properties have valid values before an instance becomes available.
We'll begin with the basics and progressively explore more advanced initialization techniques.
Why Do We Need Initializers?
When you create an instance of a struct, you need to provide values for all its stored properties.
Swift requires every stored property to have a value before an instance can exist.
For example, consider the following struct.
struct User { var name: String var isPremium: Bool}If we just try to create an instance of user withouth providing values for all of its stored properties, we get an error. Fortunately, as you will see shortly, Swift will do its best to prevent us from trying to do this.
let user = User() // ErrorDefault Property Values
When you create your struct, you can provide default values for all of the store properties and when you do this, where we failed previous, we now succeed.
struct User { var name: String = "Guest" var isPremium: Bool = false}let user = User() // OKThe Memberwise Initializer
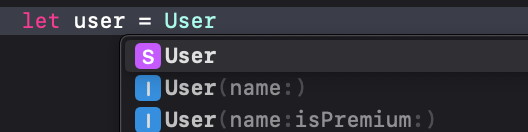
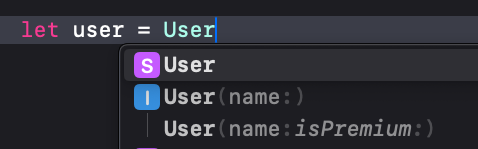
Earlier, I mentioned that Swift will do its best to prevent us from trying to create an instance of a struct without providing values for all of its stored properties. This is unique to structs and does not apply to classes as you will learn in the next post. Swift automatically creates a memberwise initializer for structs that do not define their own initializer.
This means, when you start to create an instance of your struct, Xcode will automatically provide you with all of the properties that have not yet been initialized so you can provide values for them
struct User { var name: String var isPremium: Bool}let user = User(name: "Stewart", isPremium: true)
Constant Properties and Initialization
One of the primary reasons initializers exist is to provide values for constant properties.
struct User { let name: String let age: Int}let user = User(name: "Stewart", age: 75)After initialization, these values cannot be changed.
user.name = "Bob" // ErrorConstants make your types safer because they cannot be modified after creation. Some of the most common uses for constants are IDs and creation dates.
Memberwise Initializers and Default Values
If you have properties that do have a default value assigned, you will get additional memberwise initializes so that you can override the default value.
struct User { var name: String var isPremium: Bool var age = 74}let user = User(name: "Stewart", isPremium: true)orlet user = User(name: "Stewart", isPremium: true, age: 75)
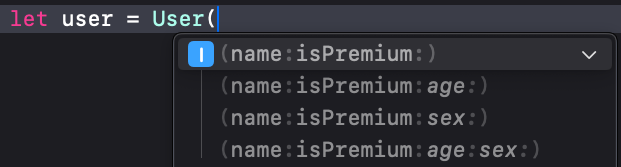
If there is more than one property that has a default value assigned, Xcode will collapse them into a single line where the ones with default values are dimmed out so of you press enter on your keyboard you will get only those properties that do not have a value assigned and the other values will be assigned their default values.
struct User { var name: String var isPremium: Bool var age = 74 var sex = "M"}
If, when creating the instance, you continue to type the names or partial names of the properties that have default values, they will be no longer be dimmed, and tapping on the keyboard will crate the memberwise initializer for all of those properties
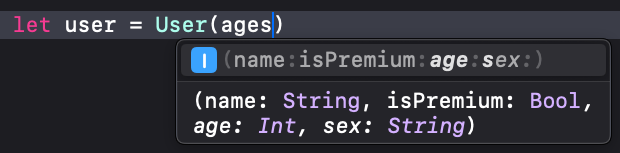
The other alternative is to use the right arrow key on your keyboard to present all possible initializers for the structure and you can choose which one you want.
Custom Initializers
If memberwise initializers did not exist, as you will see in the next post for classes, you would have to create your own initializer.
For example, in our struct that we started with
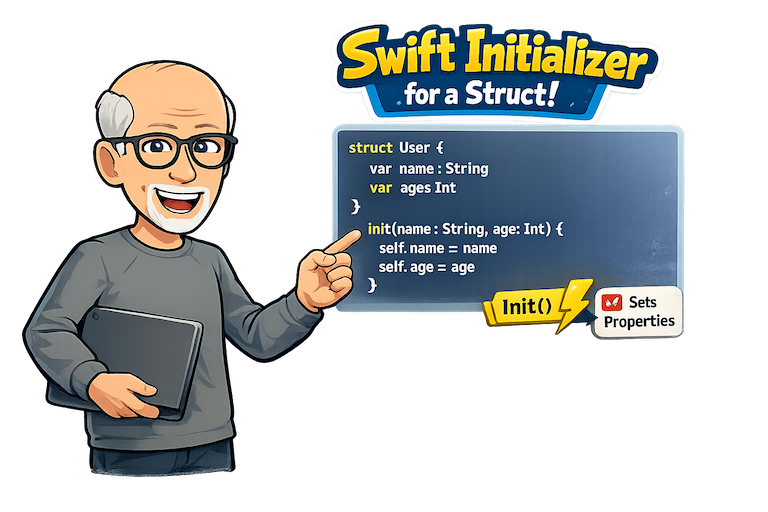
struct User { var name: String var isPremium: Bool}The initializer, which is basically a method that requires parameters for all properties that do not have a default value and assign those parameters to the corresponding properties.
init(name: String, isPremium: Bool) { self.name = name self.isPremium = isPremium}This is what we will have to do with classes as you will see in the next post.
The confusing part for beginners is the use of the syntax self.name = name
self.name refers to the actual property instance, and not the parameter, so we need to avoid ambiguity.
There is no reason why we need to use the same strings for our parameter labels as our properties however. This is just convention. If we do not use the same strings, then we can avoid using self. For example the following is a perfectly legitimate initializer.
Note that when creating an instance of User, the initializer parameter labels are used.
struct User { var name: String var isPremium: Bool init(initialName: String, initialIsPremium: Bool) { name = initialName isPremium = initialIsPremium }}let user = User(initialName: "Stewart", initialIsPremium: true)I am not a supporter of doing this however, because it can lead to confusion. It is likely wiser to use external parameter labels instead.
Initializer Parameter Labels
Initializer parameters support both external and internal names.
struct Video { let nom: String init(videoTitle nom: String) { self.nom = nom }}Usage:
let video = Video(videoTitle: "Swift Initializers")Here:
videoTitleis the external labelnomis the internal parameter name
When an instance is created, the initializers uses the external label and then assigns whatever was provided to the property in your struct that has the internal label.
Good labels can create self-documenting code, particularly if you are dealing with an API where the property names are not obvious.
let video = Video(videoTitle: "Swift Initializers")This may clearer to English speakers than:
let video = Video(nom: "Swift Initializers")Omitting External Labels
Sometimes, you don't want to have to provide a label at all and you can do this by providing an _ as the external parameter label
struct Video { let title: String init(_ title: String) { self.title = title }}let video = Video("Swift Initializers")Use omitted labels sparingly and only when the meaning is obvious.
Preserving the Memberwise Initializer
One of the initial drawbacks of creating a custom initializer is that you lose the memberwise version. This can be resolved however, by creating an extension to the struct, and creating your custom initializer in the extension instead, you get both
struct User { let name: String let isPremium: Bool}extension User { init(name: String) { self.init(name: name, isPremium: false) }}Now both the memberwise initializer and the custom initializer are available.
Multiple Initializers
You can also create multiple initializers for a struct. By doing so, you can create a version of an initializer that will assign a default value for one of the properties as you see in this example, where the second initializer assigns false to the stored isPremium property.
struct User { let name: String let isPremium: Bool init(name: String, isPremium: Bool) { self.name = name self.isPremium = isPremium } init(name: String) { self.name = name self.isPremium = false }}You can use multiple initializers when there are multiple valid ways to create an instance.
Initializer Delegation
And there is an another way to accomplish the same thing as above by using initializer delegation. Delegation can avoid duplication by having one initializer call another
For example, here, the second initializer
struct User { let name: String let isPremium: Bool init(name: String, isPremium: Bool) { self.name = name self.isPremium = isPremium } init(name: String) { self.init(name: name, isPremium: false) }}Convenience Initializer for Structs
There is a simpler way to accomplish exactly the same thing as the above two example. You can provide a default value right within the initializer itself
struct User { let name: String let isPremium: Bool init(name: String, isPremium: Bool = false) { self.name = name self.isPremium = isPremium }}Both
Failable Initializers
Initializers can be failable too. You add ? to the end of of the init.
struct EmailAddress { let value: String init?(value: String) { guard value.contains("@") else { return nil } self.value = value }}let valid = EmailAddress(value: "stewart@example.com") // valid Optional<EmailAddress>let invalid = EmailAddress(value: "invalid") // nilUse init? when initialization should either succeed or fail.
Throwing Initializers
Initializers can also throw errors and this can be handy if you want to provide detailed failure information. These are better in my opinion than Failable initializers.
enum PasswordError: Error { case tooShort case missingNumber}struct Password { let value: String init(value: String) throws { guard value.count >= 8 else { throw PasswordError.tooShort } guard value.contains(where: \.isNumber) else { throw PasswordError.missingNumber } self.value = value }}Final Example
Putting it all together, here is an example of a Course struct that
- Default parameter values
- Validation
- Throwing initialization
- Delegating initialization
enum CourseError: Error { case emptyTitle case invalidLessonCount}struct Course { let title: String let lessonCount: Int let isPublished: Bool init( title: String, lessonCount: Int, isPublished: Bool = false ) throws { guard !title.isEmpty else { throw CourseError.emptyTitle } guard lessonCount > 0 else { throw CourseError.invalidLessonCount } self.title = title self.lessonCount = lessonCount self.isPublished = isPublished } init(draftTitle: String) throws { try self.init( title: draftTitle, lessonCount: 1, isPublished: false ) }}Conclusion
Most structs begin life with default values or Swift's synthesized memberwise initializer. As your types become more sophisticated, custom initializers allow you to validate input, simplify APIs, and prevent invalid state.
A good progression is:
- Start with the memberwise initializer.
- Add default values where appropriate.
- Create custom initializers when business rules emerge.
- Delegate whenever possible.
- Use failable or throwing initializers when validation is required.
Understanding these patterns will make your Swift code safer, clearer, and easier to maintain.
------
YouTube videos on Initializers
Here are some videos that I have created on YouTube on Initializers.
The first two were back in 2020
Initializers Part I
Initializers Part II
And then I created another one in 2024 with much of the same content, but presented in a slightly different way.
Understanding Swift Initializers