
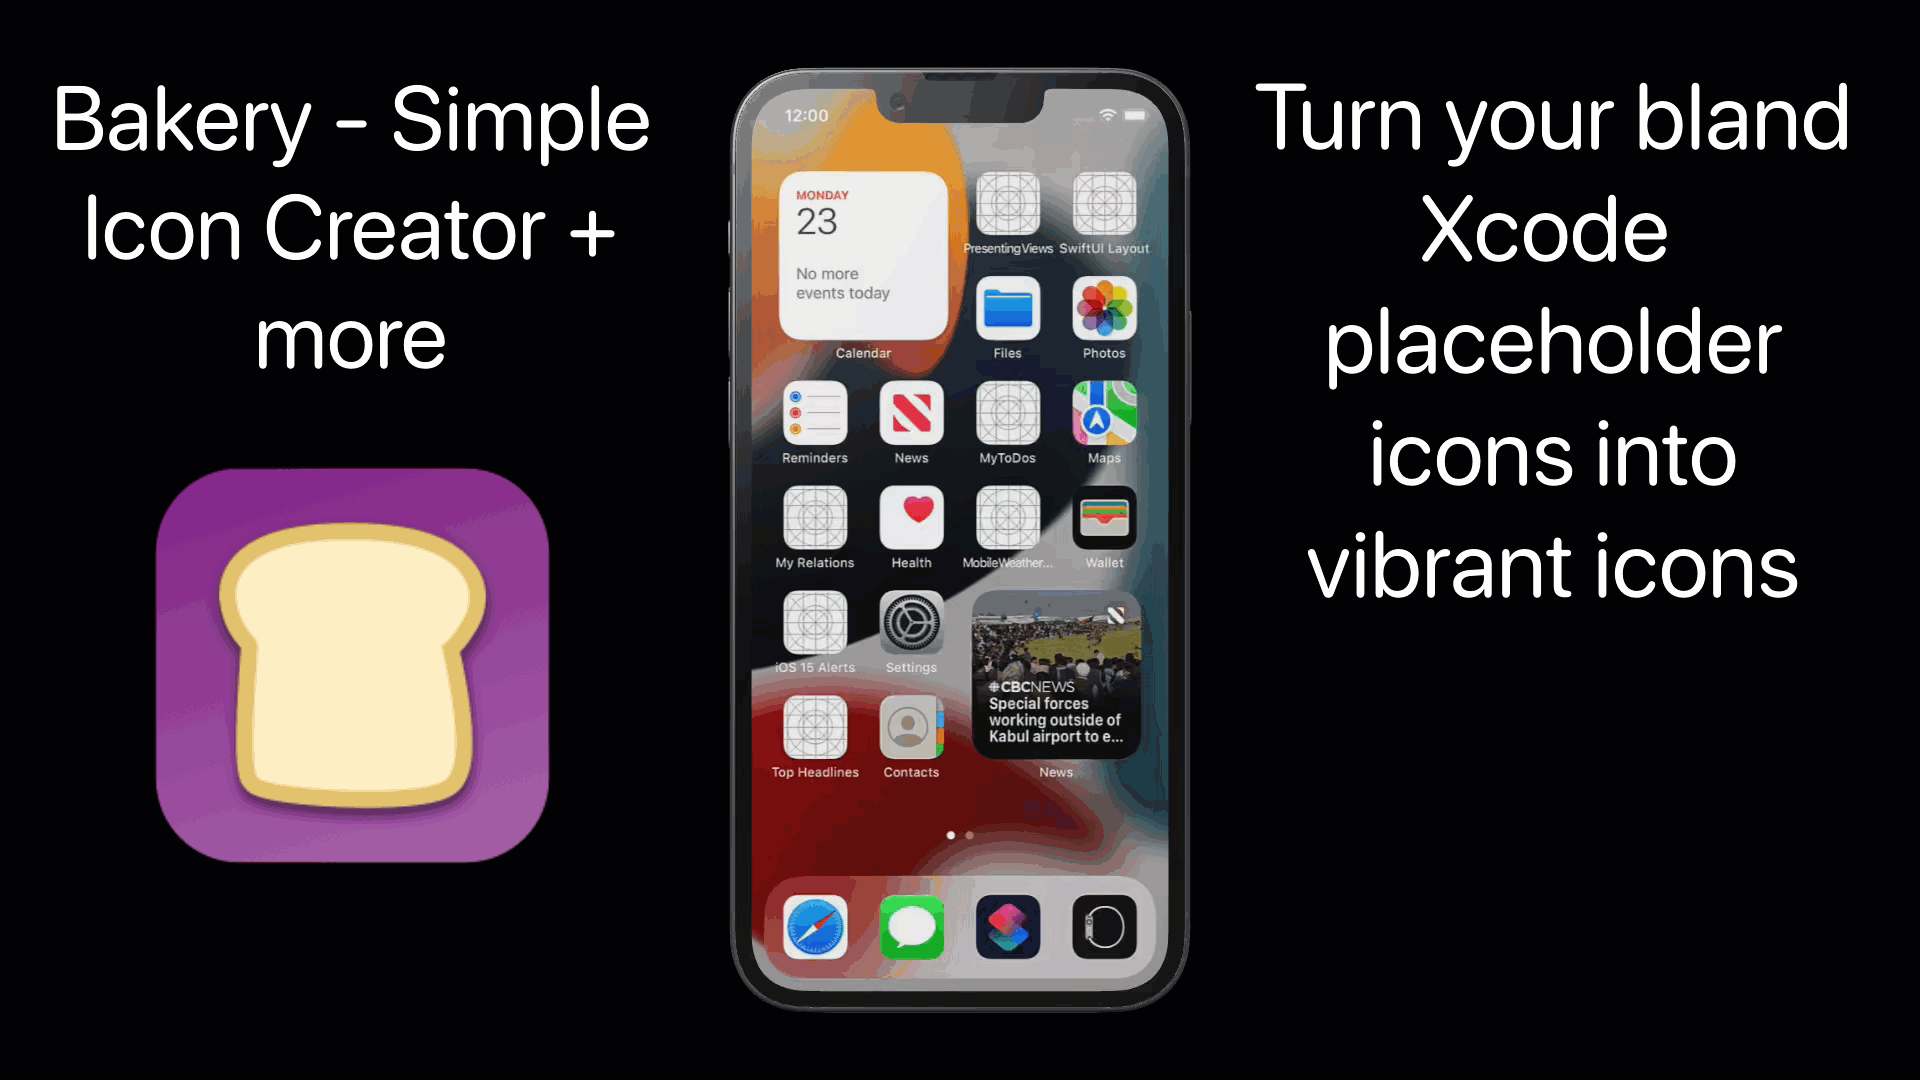
Bakery - Simple Icon Creator
If you are an iOS developer, your phone or simuilator is cluttered with those white placeholder icons that every new Xcode project generates.

Well, bland, white icons no more. With Bakery, it is easy to create custom icons in a matter of seconds and drop the assets directly into your Xcode project.

I have been reluctant to create a blog post or video on this app because the develooper, Jordi Bruin is so active in updating it that sometimes there are updates every second day.
However, this app is just too good to keep a secret so I am starting with this blog post. If more changes are made, it will be easier to update the blog.
Once it has become feature complete, I will create a video for my YouTube channel.
Creating your Icons
The interface of Bakery is really quite straightforward and intuitive

-
The Preview
As you design your icon, the preview updates as you go.
-
Icon Images
You can choose to add up to 2 different images. These images can be a combination of 1 custom image plus either an SFSymbol or an emoji or, if you can choose not to have a custom image you can choose either two SFSymbols, two emojis or one of each. When you select one of the two images, it gets moved to the front and you can drag to position it.
Custom Image
To add a custom image, prepare your PNG image with a transparent background and then simply drag it on to the icon. This will reset the entire icon and place the custom image in the first position. You can then add a second sfsymbol or emoji in the second position.

-
Previously generated icons
When you generate your icons, a representation of the icon is saved for future reference or editing.
-
Background Color
You can choose from a preset, custom or saved color for your icon background. You can also choose to have Bakery generate a gradient for the background.

-
Icon Color
If you choose an SFSymbol for one or more of your images, you will be able to choose the icon color. This color can be from from a preset, custom or saved color.
-
Scaling Images
If you select either of your two images, that image gets moved to the front and you can adjust the size.
-
Icon Thickness
If your image is an SFSymbol, you can select your image and choose from one of the 9 different font weights

-
Icon Badge
A custom badge can be added to your icon in one of four different positions with a background color of your choosing. You can select from one of the preset text options or create your own custom text.
-
SFSymbol or Emoji
You can choose a symbol or an emoji by browsing the images or you can filter the list by typing in a search term
-
Recently Used
Recently used symbols and emojis are remembered.
-
Generating your icon
Once you are satisfied with your icon you can generate the Asset folder for Xcode. This creates a floating window with your icon ready to drag and drop into your folder.

Adding Assets to Xcode
Once you have generated your icon and have created the floating window you are ready to add it to your Xcode project. It is a simple 2 step process.
Step 1
The first thing you need to do is to open your Xcode project and the Assets.xcassets folder, then click on, and delete the AppIcon.

Step 2
The final step is to drag and drop the floating window from Bakery onto that Assets pane where you just deleted the placeholder.
That's it.

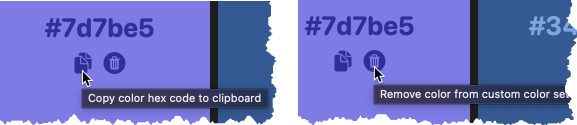
Custom Color Set
Bakery allows you to create and store custom colors.

- Custom colors appear in the pallet selection.
- Tap the + color icon or tap on the Custom Colors item in the side bar to go the Custom Colors page
- Tap on the color wheel and select how you want to choose your color. Either by picking using the color wheel or by entering a HEX or RGB code
- Tap the + button to add to your custom colors. All Custom colors will appear in the tab and consequently in the selection swaps on the main screen.
You can hover over the copy button on a custom color to copy the hex code or on the delete button to remove the color from your custom color set
Inspiration
A recent addition to Bakery is the new Inspiration tab. You can have Bakery generate a random set of icons for you and choose whether or not you want a random mix of emojis or symbols, use a gradient background or not and choose either just your custom colors or a random set of background colors.

Screenshots
One of the most frustrating and time consuming tasks of an app developer is the submission to the App Store. You want to make sure that you create pleasing images that will represent your application.
-
Select the Screenshots tab and select from one of the different templates.

-
Drag and drop your phone or simulator images on to the templates.

Configure the styles

-
Select a device type.
-
Choose the background color.
-
Choose if you want to have the background set as a gradient.
-
Choose the color for your text.
-
Choose your preferred font.
-
Adjust the text size.
-
Choose the device color.

-
Select individual screens and compose image caption.
-
Select individual screens and select top or bottom for image position.
-
Click on Generate Screenshots.

App Store Connect
You can log in to your App Store Connect account and go to the screenshot section of your app and drag and drop the images directly to upload them.

Pastry Chef
Jordi is one of the most responsive developers that I have come across. He responds quicky to suggestions from his users and many of the features that are in the app have resulted from user input. I encourage you to reach out to him with suggestions for what you would like to see in the app.
Bakery is currently a free app but if you want to suipport development and unlock extra customization features in the future, please consider making an in-app purchase

Mac App Store
Available on the Mac App Store